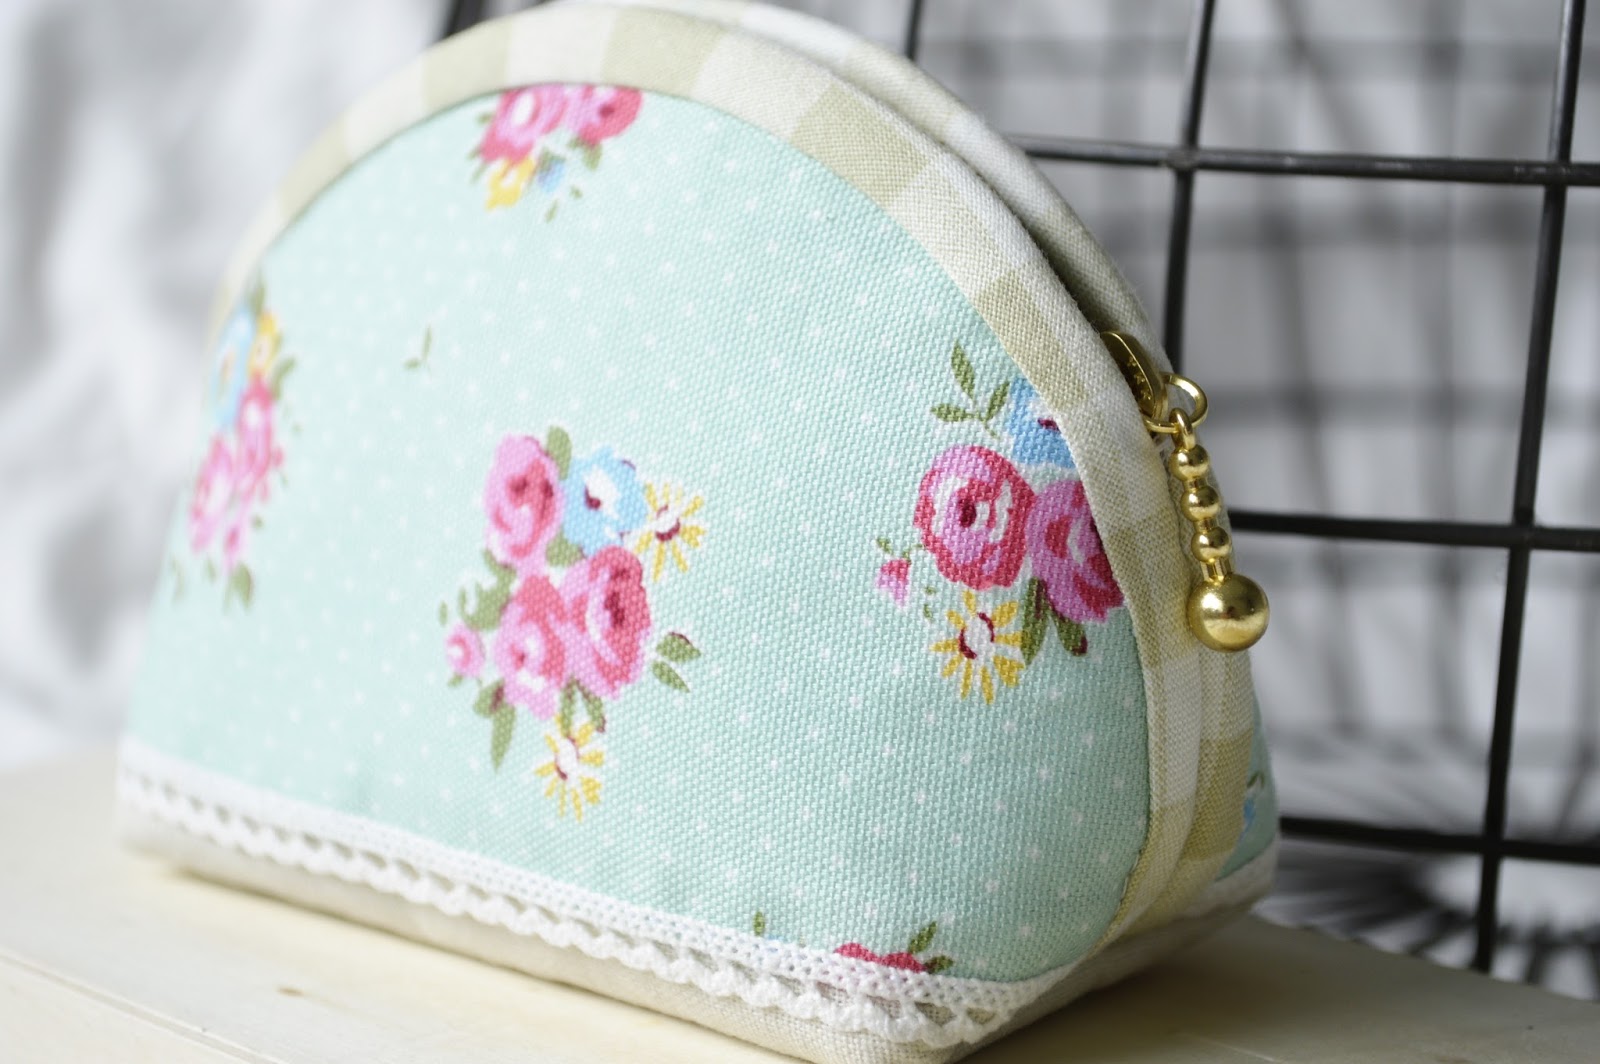
I sew this sweet pencil case for my niece Jaymee who just started school 2 weeks ago. what made my heart smile was that she thought it was bought in a shopping mall. I told her i sew it and will teach her how to sew one for herself next time. :)
The completed pencil case will measure at 8"(L) x 1"(W) x 3.5"(H)
This tutorial will consists both machine and handsewing (something that i have been enjoying lately) and best of all it helps to clear up your scrap bin. :)
I need to apologise in advance as some of the photos will appear to be darker as it has been a raining week when i took them. :)

Materials Required :
★★ Exterior fabric (front panel) --> Scraps of Fabric
cut 1pc of 8.5" x 1.5" for bottom (use the same fabric as the back panel)
cut 12pcs of 1.75" x 1.5" (for patchwork)
cut 1pc of 3.5" x 3.5" (for centre piece)
★★ Exterior fabric (back panel) --> cut 1pc of 8.5" x 4.5"
★★ Interior fabric --> cut 1pc of 8.5" x 8.5"
★★ Binding (for single fold) --> cut 1pc of 1.25" x 30"
★★ Interfacing --> cut 1pc of 8.5" x 8.5"
(choose your interfacing based on the result you are after. I use a light weight sew-in interfacing for mine)
★★ Zipper - 1pc of 9" or 10" (i use 10" for mine)
★ ★ (optional) Crochet Lace Trim - cut 2pcs of length 4"
(my fabric prints seems to go well with crochet lace trim, thus i use it. you can replace it with ric rac, pom pom trim or not use at all. Is optional. :) )
★ Using 1/4" seam allowance throughout ★

1) Arrange your 12pcs of 1.75" x 1.5" blocks and 1pc of 3.5" x 3.5" center piece block to your desired layout.

2) sew 3 blocks in a row to form 4 sets as shown above and press seam

3) ** if you are using Ric Rac or Pom Pom Trim, sew them onto the side edge of center piece before sewing the sets together. **
Sew 4 sets and your center piece together as shown above and press seam.
Your front panel is almost complete. Fast isn't it. :)

4) Placed your almost complete front panel on top of your interface. Match them to the edges and pin or clip them in placed as shown

5) Quilt as desired. I have quilted simple straight lines. :)
** if you are using crochet lace trims, align them along the sides of the centre piece and hand sew them using back stitch.

6) Place your 8.5" x 4.5" exterior fabric back panel and 8.5" x 1.5" bottom panel together as shown. Pin them in place and sew them together. Press seam.

7) We will sew the bottom panel to the front panel. Align them together with right side facing each other, pin in placed.

8) Sew them together.

9) Press Seam.

10) Using 1/8" (or you can sew near the edge) seam allowance, sew around the 3 sides of the exterior fabric back panel

11) Fold it in half with right side facing each other, pin in placed
Using 1/4" seam allowance, sew along the 2 sides as shown

12) If you prefer a flat pencil case, flip it right side out and skip the below steps and go straight to step 17
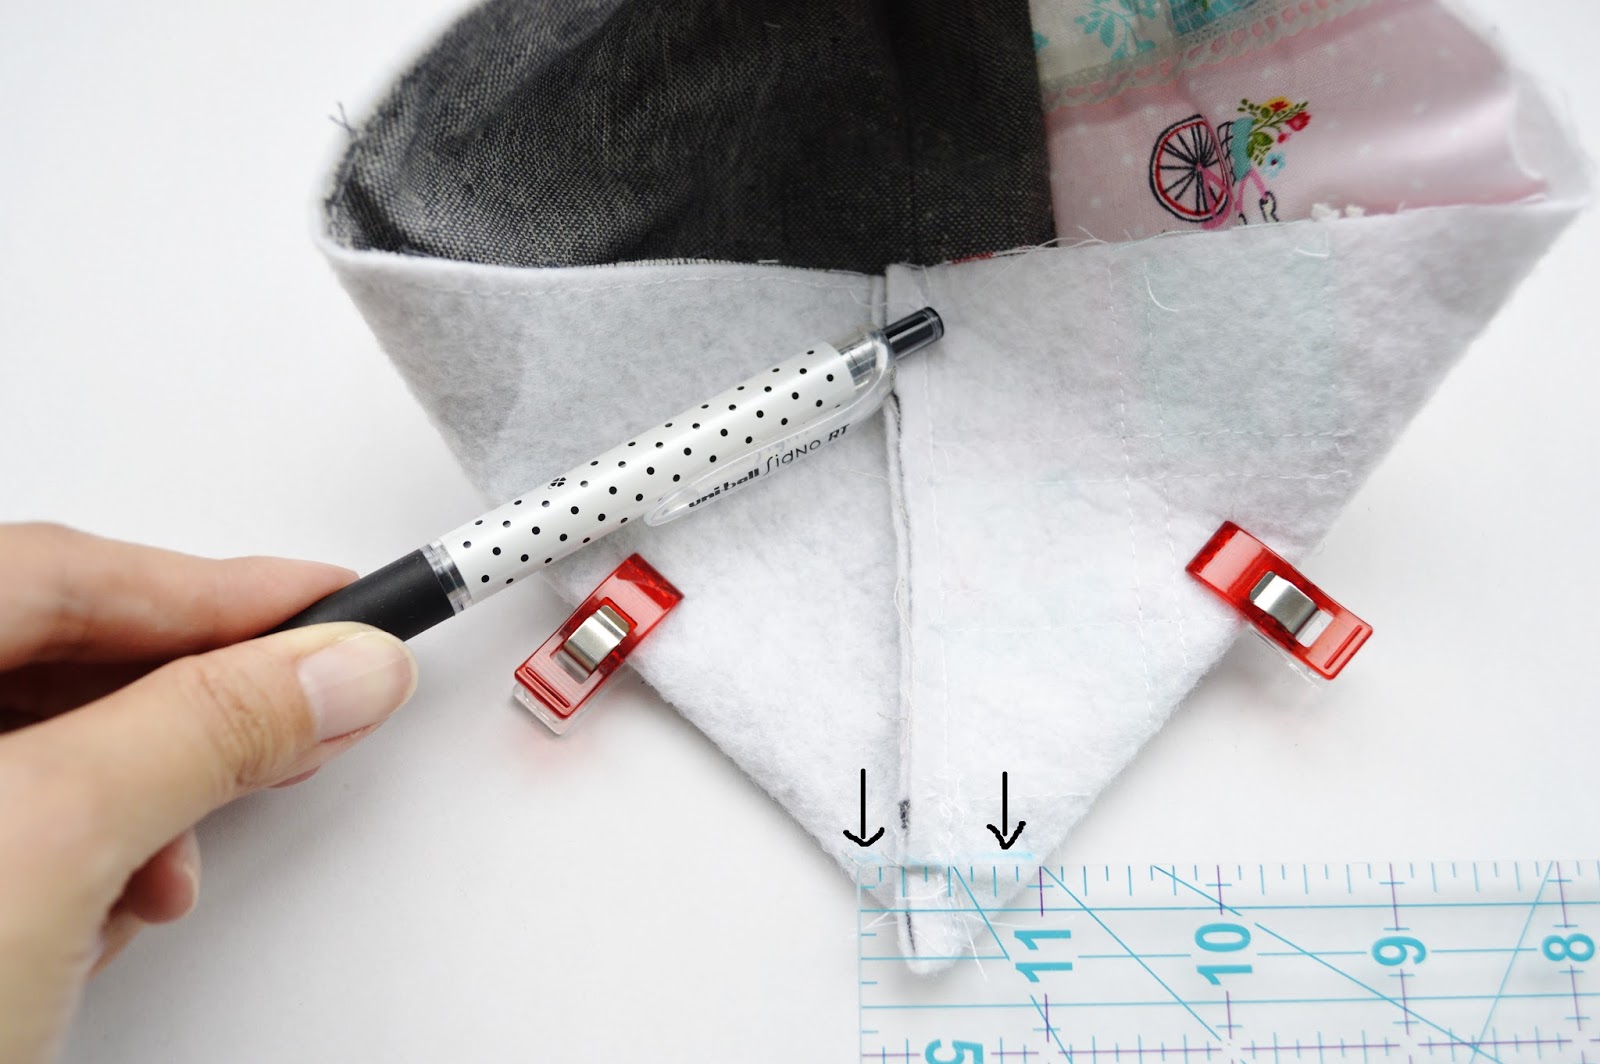
13) To create a base, fold the corner as shown.
To make sure that the base is even, the sewn sides where the pen is pointing must be in line with the bottom and back panel "joined seam".
Clip them in placed.
Use a ruler and water soluble marker, mark and draw a line as shown.
The total base width of the pencil case will be 1"

14) Sew on the line that you have drawn. Back stitch at the beginning and end.
i sew on the line twice, so that it will be more secured. :)

15) Measure 1/4" from your sewn line and trim the corner away.
Repeat step 13 to 15 for the other corner.

16) Flip the pencil case right side out.

17) Fold your 8.5" x 8.5" Interior fabric in half, right side together and sew the sides as shown
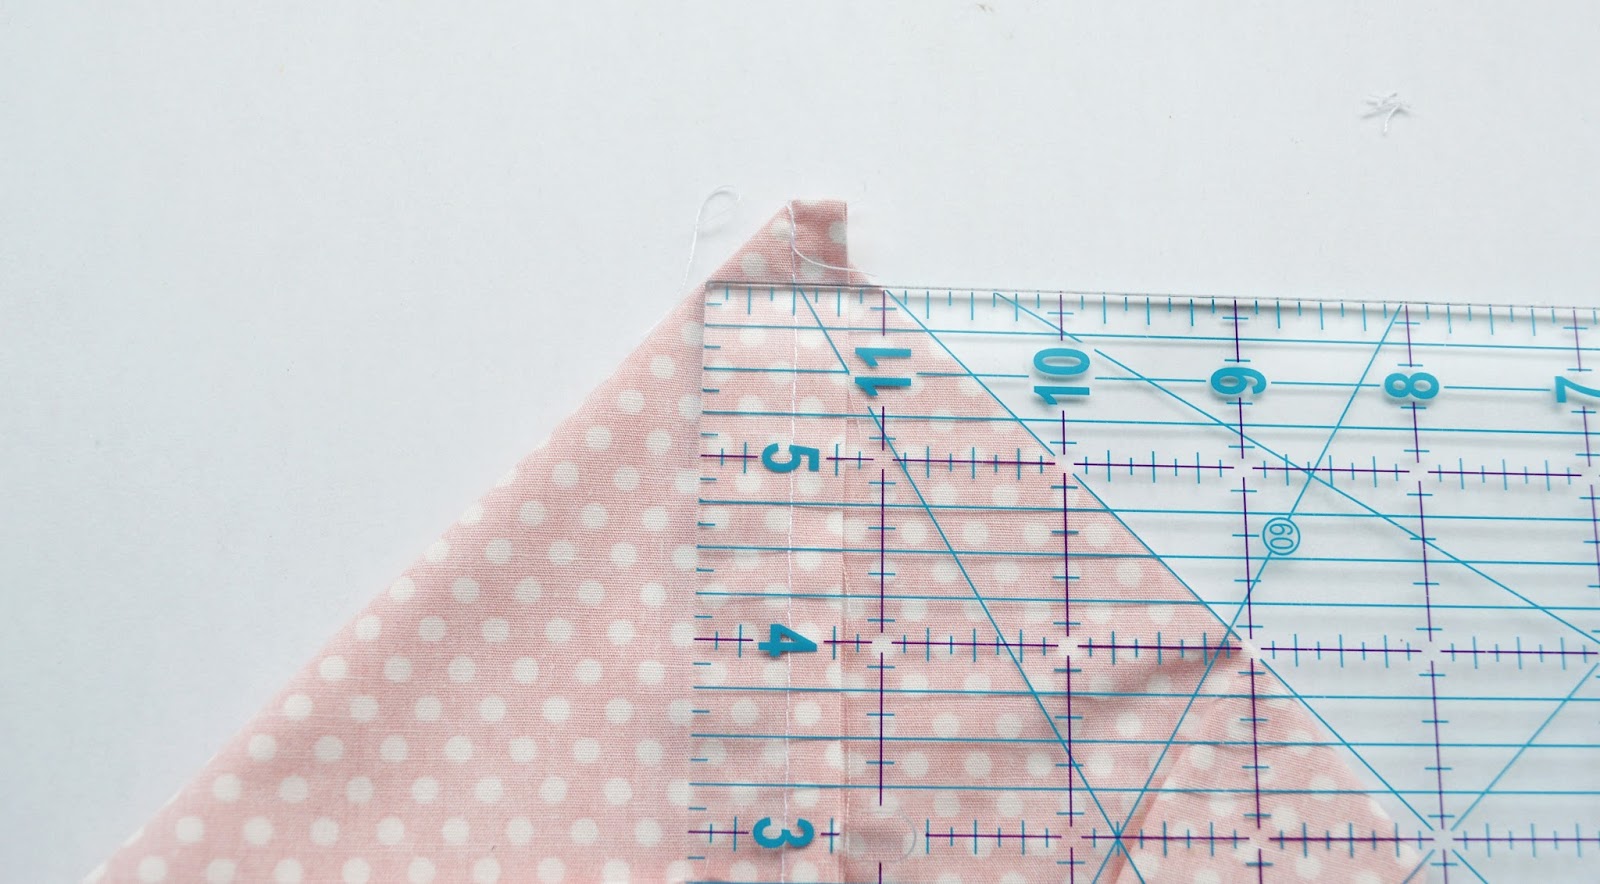
18) Repeat step 13 to 15 for both corners of the interior fabric


19) With the wrong side facing each other, placed the interior and exterior fabric together as shown.
Clip them in placed.

20) We will be using a single fold binding method for our pencil case. :)
Trim of the top corner of your 1.25" x 30" binding as shown above

21) Pin the binding along the edges as shown above

22) Trim off the excess binding and pin them in placed as shown above.
This is usually how i join my binding ends for pouch. There are many ways to join binding ends. you can check out the wonderful tutorials and youtube videos online and pick a style that you like. :)

23) Using 1/4" seam allowance, sew along the edges as shown


24) Flip your pencil case inside out so the interior fabric is facing up.
Turn the binding over carefully and turn the raw edge of the binding under and pin or clip in placed.
** For me, usually i don't pin or clip in placed. I will fold and sew along, because i am lazy. :) But, if you are not use to handsewing, pin or clip will make it easier to sew. :)

25) With a needle and thread, start the first stitch underneath the binding to hide the knot.

26) Ensure that your folded binding covers the stitched area on the interior fabric.
Blind stitch all the way.

27) If you would like to know how i end the stitch and hide my knot, you can find it on my previous tutorial here Step 23 & 24.

28) Now, here comes my favorite part. Hand sewing the zippers. :)
With the zipper pull on the right side facing downwards, align the zipper teeth along the edge of the binding. Pin them in placed.

29) To sew the zipper to the pouch, i start my first stitch under the zipper, so that the knot is hidden.

30) Back stitch throughout the length of the zipper.
Be careful not to sew through all layers of the binding. The needle should only pick up the first layer of the binding fabric next to the zipper.

31) End the stitch underneath the zipper so that the knot will be hidden

32) I sew a row of catch stitch at the bottom of the zipper. A row of back stitch will do just fine too.
Repeat step 28 to 32 for the other side of the zipper

33) Flip the pencil case right side out.
Ta daaa~~ Finished!

My first try at applique. Looks a little wonky but i had fun sewing it!
and it adds a little cuteness to the back of the pencil case. :)


Hope you have enjoy making this pencil case as much as i do
If you have any query, feel free to drop me an email. :)
Have a wonderful week ahead my friends.
xoxo Jean